SHORT BUS CONVERSION
A ODE OF LOVE TO CRUNK, THE 14 SEATER 1996 GMC THOMAS-BUILT BUS
This is an article about the conversion of my 1996 GMC 14 passenger short bus, Crunk. You can think of it as more of an ode of love to Crunk, rather than a blow-by-blow of the steps taken to convert this rattling box of metal into a space I’m proud to call home.
That is, you won’t see any sentences that read like, “I fit 42 2-1/2 inch self-tapping screws into the subfloor at six inch intervals so the 2x2 standard plywood framing struts would align with the standard for R-14 insulation installation.” Fuck that. There are thousands of build posts out there with drool-by-day play-by-plays, owners who documented each step with videos and pictures, entire websites dedicated to awesome projects which helped me make my bus a home. This isn’t what this page is for. If you were misled here by some devilish twist of Google keywords algorithm poltergeistry, I apologize. I suggest you travel here, to Traipsing About, and continue your journey into the van conversion wormhole. However, know that I am available and excited to answer specific questions at reese@livewildcollective.com.
For those of you who are choosing to stick around and learn about life in a short bus, bear with me for a paragraph longer. This is important. I feel the need to bless this article.
Ahem. Oh Crunk, my love, my bus, you are all I could have hoped for and more. You are my adventure vehicle, my adventure home. I love your thick chassis and single-pane windows. I love how you wobble on sharp turns, the kick of the engine as you shift from first gear to second. I bless you for what you are, a twenty year old bus with a new purpose in life. No longer shall you carry screaming children to and from school. Rather, we shall enter this partnership of relationship as equals. You are my comfort and security. And I am your sole attendant. For thine is the kingdom of this 8 x 10 foot home, the power of vision and will, and the glory of actualization. I bless you, and send us forward on a long and wonderful journey.
The Backstory
Crunk was previously known as ‘Bus 7’ at a school in Winston-Salem, NC. I substitute taught at this school for several months in the spring before moving to Durango, CO. One day early in my work I sat down at the lunch table with the maintenance staff and began talking about my dreams in life – what I wanted and where I hoped to go. Aspirations for living out a van were verbalized around a mouthful of cafeteria spaghetti. I saw the maintenance manager’s eyes widen, and a hand rise to stroke a gentle gray goatee.
“You know, we are selling a short bus at the end of the summer.”
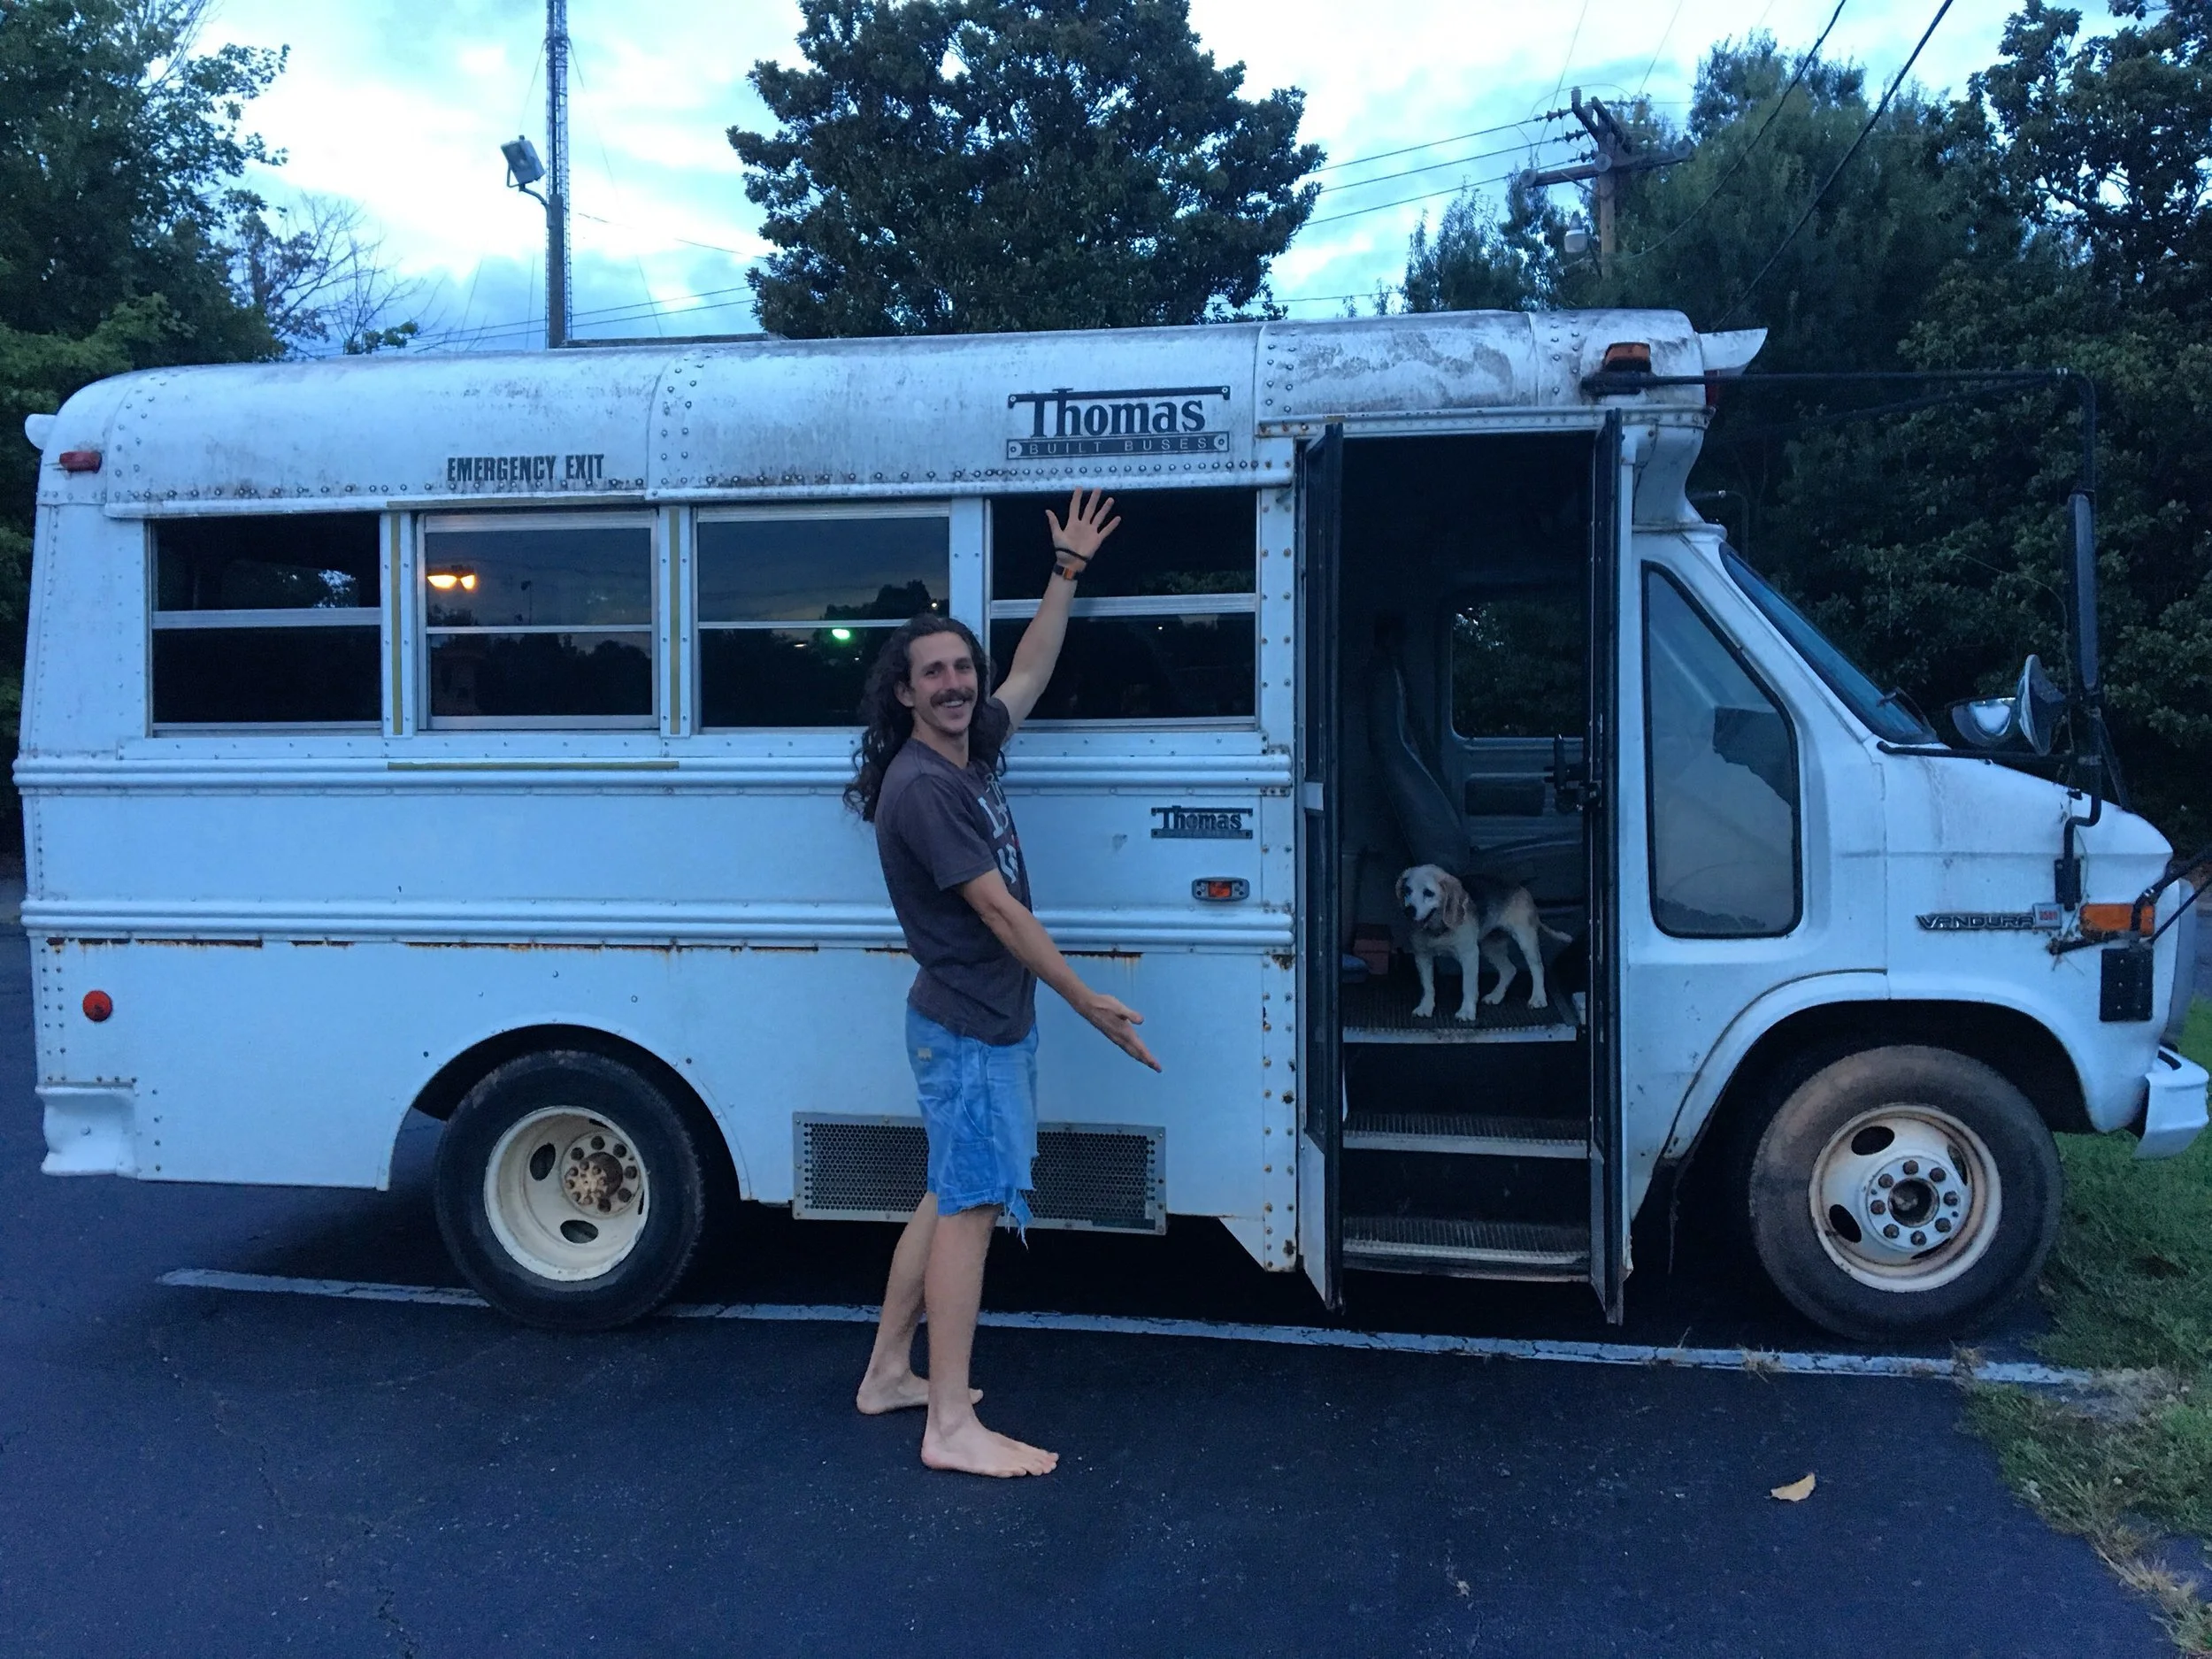
We stayed in touch, and in early August ownership of Bus 7 was transferred to me. I had a fully functioning bus, complete with a blinking stop sign. I was a (very) proud bus owner.
My initial thoughts were to spend the fall and winter working on the bus, fitting in time around teaching yoga, working at the school, and building websites through my company, Live Wild Collective. In the spring I’d move out of my home and take Crunk on a road trip around the country, give her all the fresh western air her twenty year old carburetor could inhale. Little did I know how quickly these plans would change ...
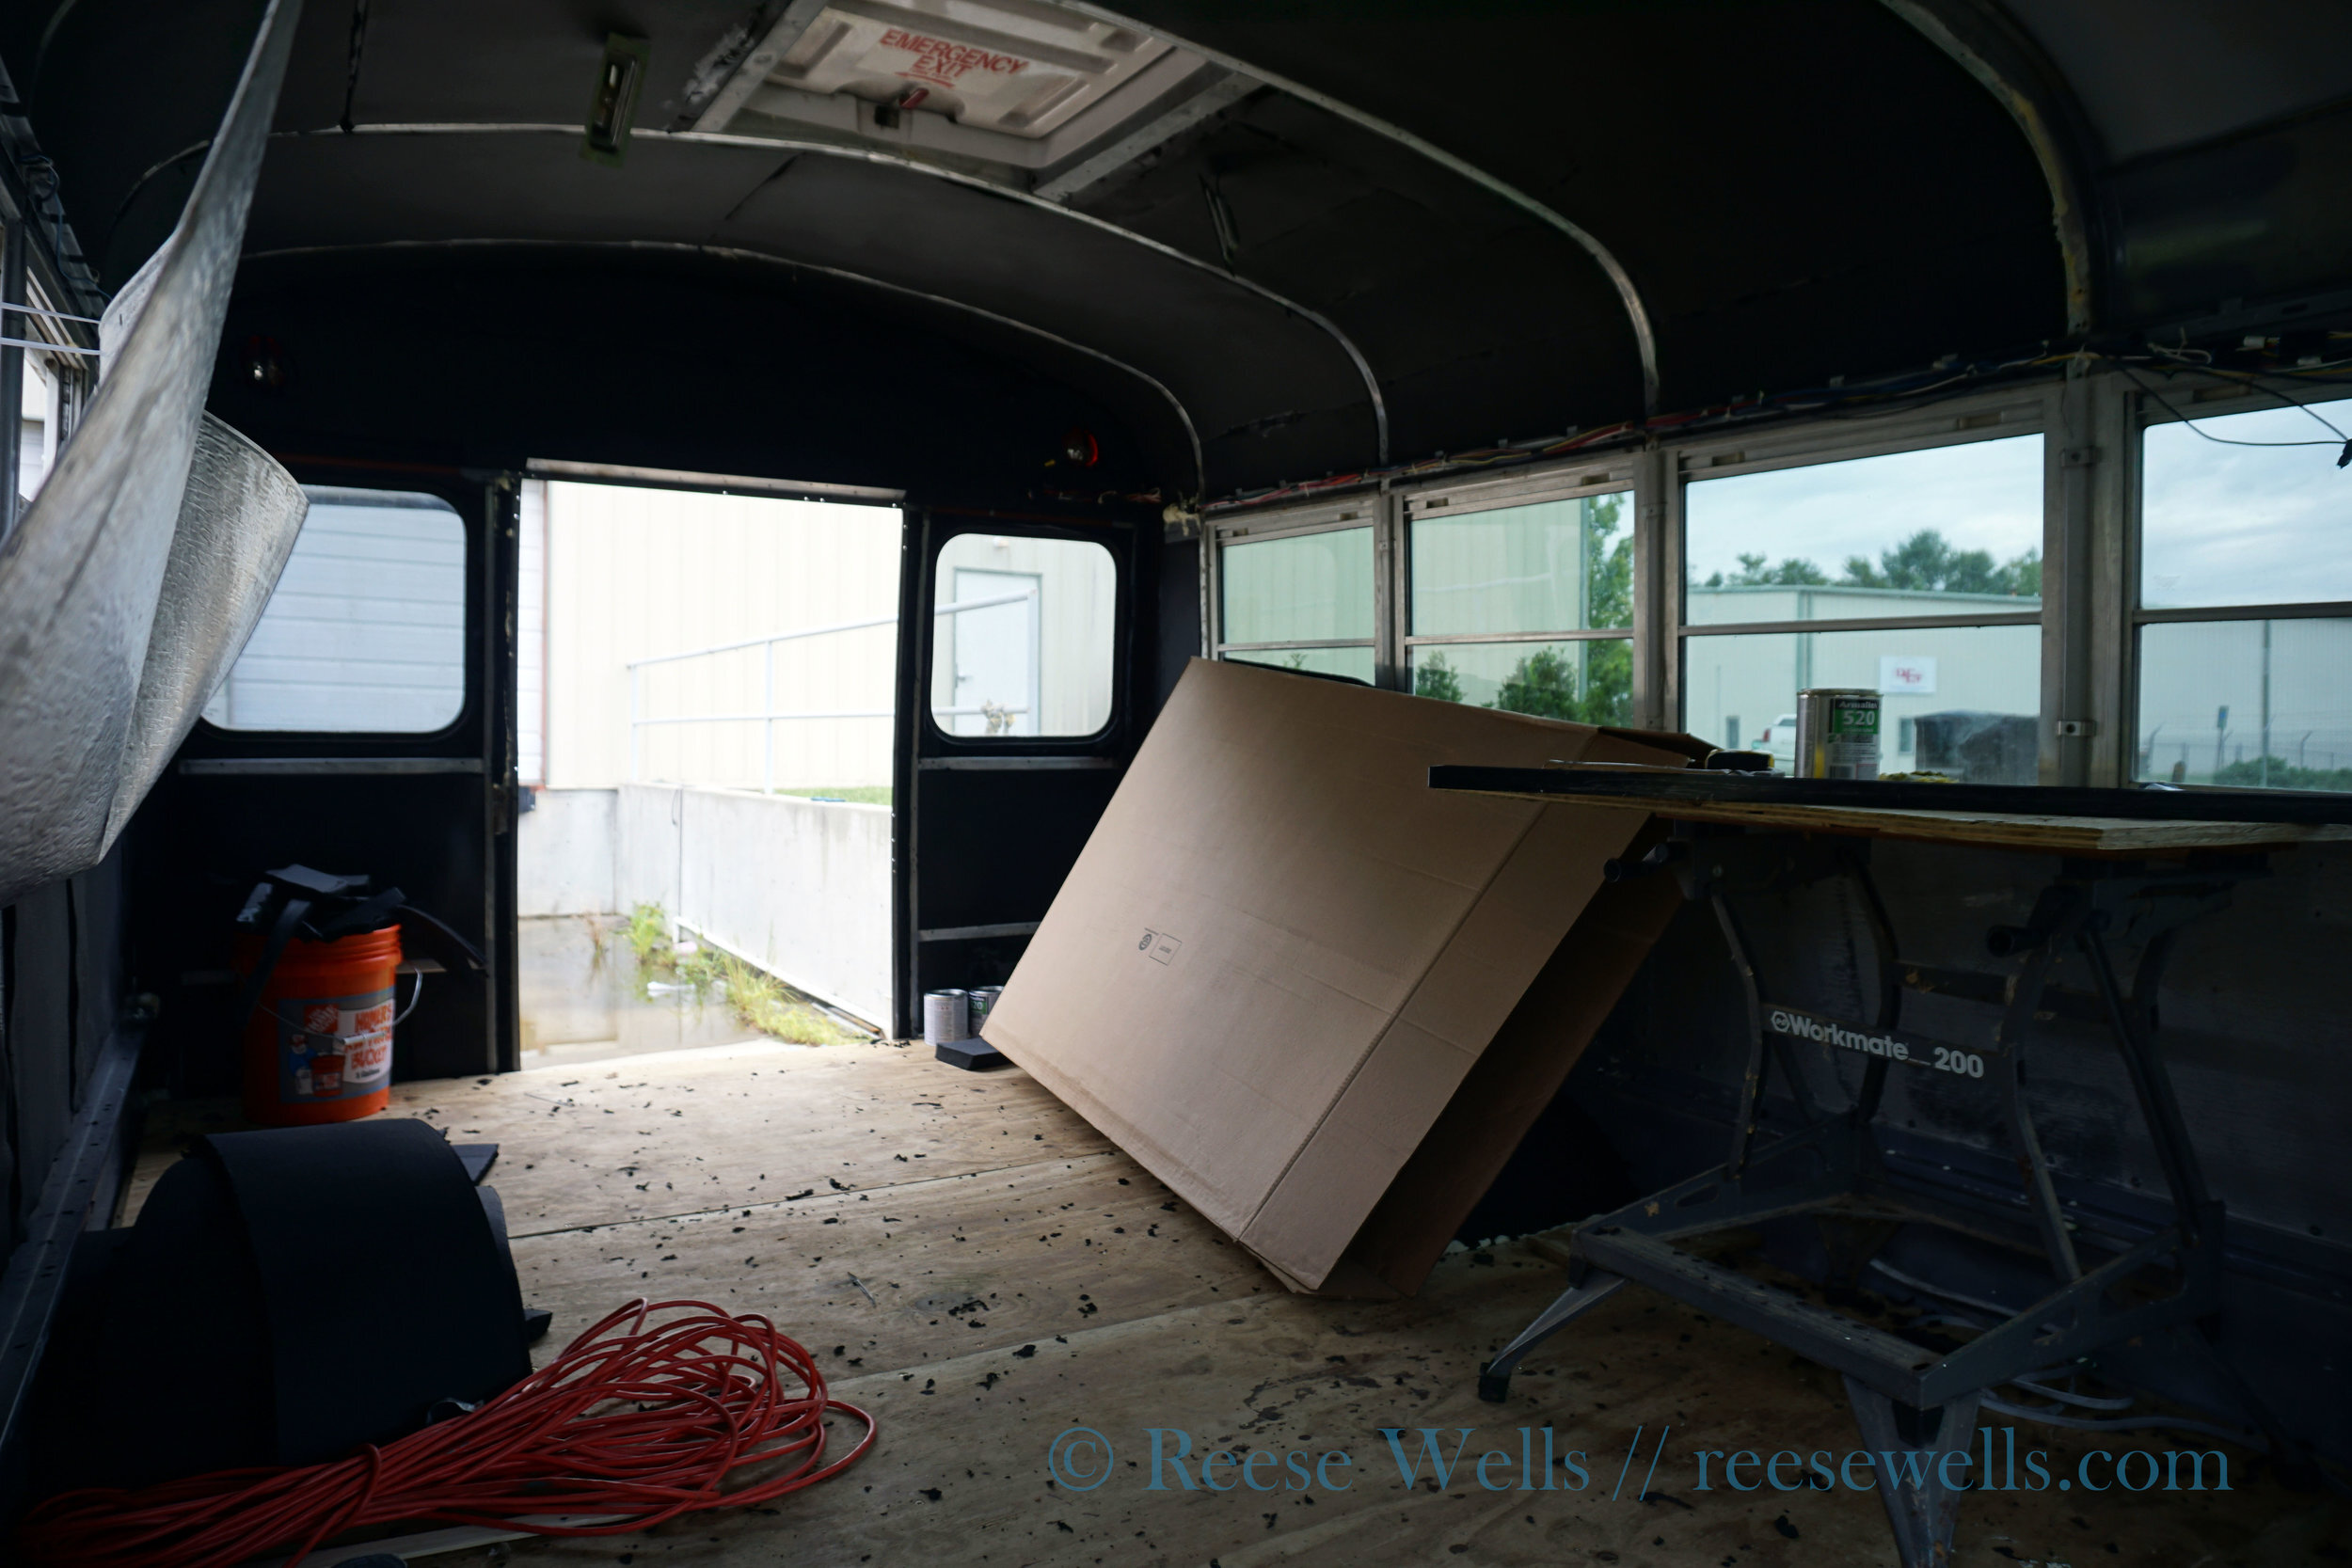
Stage I, Deconstruction

Removing School Bus lettering. It's officially official!
Antsy as I was to start building out Crunk, I knew that I’d need to take apart some things first. What I didn’t realize was how much work this would take. Weeks worth – a hundred hours dedicated to ripping the goddamn bus out from the inside, gutting her like a fat fish bleached white in the sun. We’re talking crowbars & Bruce Springsteen kind of work. We’re talking Bojangles and impact drivers.

My mighty workspace.
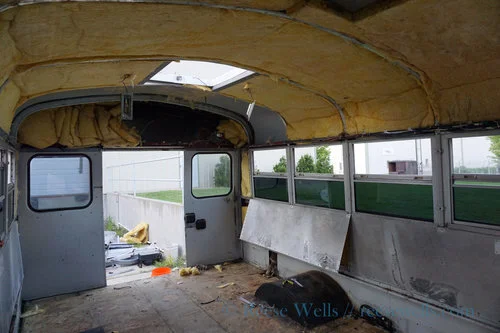
Pulling paneling & insulation.
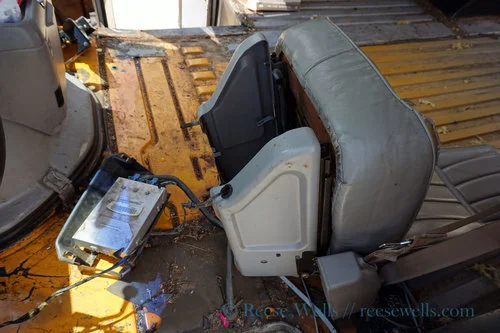
Removing the driver's seat.

Hooray for high mouse activity!

Seat removal
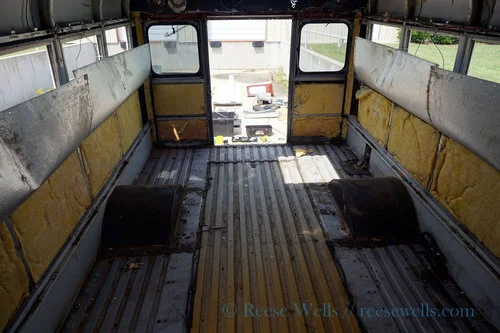
Bare floors and gutted walls.
I was fortunate to have a workspace out at my Dad’s business, a metal fabrication factory on the outskirts of town. Here I was able to park the bus, run electricity, and cause a huge clatter all day long without anyone raising an eyebrow. With the sound of metal falling to the ground and lusty tapestries of curses floating out from the factory doors I felt in fine company. I began tackling the bus in earnest.
First off was removing the school lettering and stop sign. This allowed me to legally drive the bus faster than 35 mph. Crunk just became street legal. Next came the seats and floor. Then it was the driver’s seat, door arm, and wheel wells. After twenty years half the screws were rusted through or totally fused to the frame.The walls came next. Each panel had about fifty screws, many which had been stripped. The walls, the ceiling, the front paneling. Then we ripped out the insulation, old, moldy stuff littered with rat droppings. I’m grateful to have not gotten hantavirus.
And then, like that, I had a gutted bus. Crunk was hollow. I spent a couple days cleaning her out, taking Simple Green to her insides, scrubbing her out, and scheming about the next stage of the process.
Stage II, The Floor

Framing out the insulation for the floor.
I got the idea for the flooring from some website of a couple who were converting a coach bus. I don’t remember the site. It was quite robust and appreciated. Basically, I was going to make a subfloor, layer in a couple inches of insulation, and then put in a top floor. So that’s what I did, a ¾” weatherproofed plywood floor, two inches of Armaflex (a NC local insulation company), and another ¾” plywood floor cut to fit from the back of the chassis all the way up to the driver’s seat.
This was the part of the process where I could actually see things starting to move along. I’m such a sucker for huge visual signs of progress that, after three days of working on the floor, I felt such a rush of excitement over finishing the floor that I struggled to accept the amount of work yet to come. So I enjoyed this moment, and let that momentum carry me into the insulation phase of the project.
Stage III, Insulation
Insulating Crunk. Walls & ceiling done, the viscera of insulation scattered about.
It was right when I begin insulating the bus that I knew that I might be moving to Durango, CO. I had an interview coming up, and I was confident that I’d get the job. That meant living through a Colorado winter. That meant negative temperatures, howling winds, rough living conditions. That meant, really, that insulation became king. So we went all out on some Armaflex. Almost 2” of insulation covering every square inch of interior, excepting the windows. Those would require creative insulation solutions once the build was complete.
After four days of insulating Crunk, she was finished. My hands were covered in contact cement and shredded insulation, and I believe I lost a significant number of brain cells from glue fumes rising up from my work station, but suddenly the hot Carolina fall didn’t seem so oppressive inside the bus, and that gave me reassurance that the cold Colorado winter wouldn’t be as cold.
So, with the insulation done, I went out to Colorado, anxious about the interview, and nervous what that might do to my timeline with Crunk. This, coincidentally, marked the point of the project where I stopped giving a shit about taking photos of my progress.
Stage IV, The Ceiling
Sexy shine of a new embossed aluminum ceiling.
While I was interviewing for a field guide position with wilderness therapy, my Dad was scheming. Through his work he’d come into contact with professionals who worked with embossed aluminum. And, after talking with me about it, brought them on as a birthday gift to me. They whipped out an amazing aluminum ceiling in two days, and when I returned back from Colorado, with a new job and a three week start date, I suddenly had a ceiling that shone bright with the light of love.
The difference between professionals and my work is stark and worthy of comment. Usually when folks visit the bus one of the first things they remark upon is the ceiling. I feel so grateful for it – it adds a classy airstream aesthetic to all the rough plywood I have hammered into Crunk.
And now, the pressure was on. I had two weeks to get as much stuff done on the bus as possible before packing up the bus and moving out west. My goals were to get the metal work done while I still had access to a fabrication shop.
Stage V, Metal Work
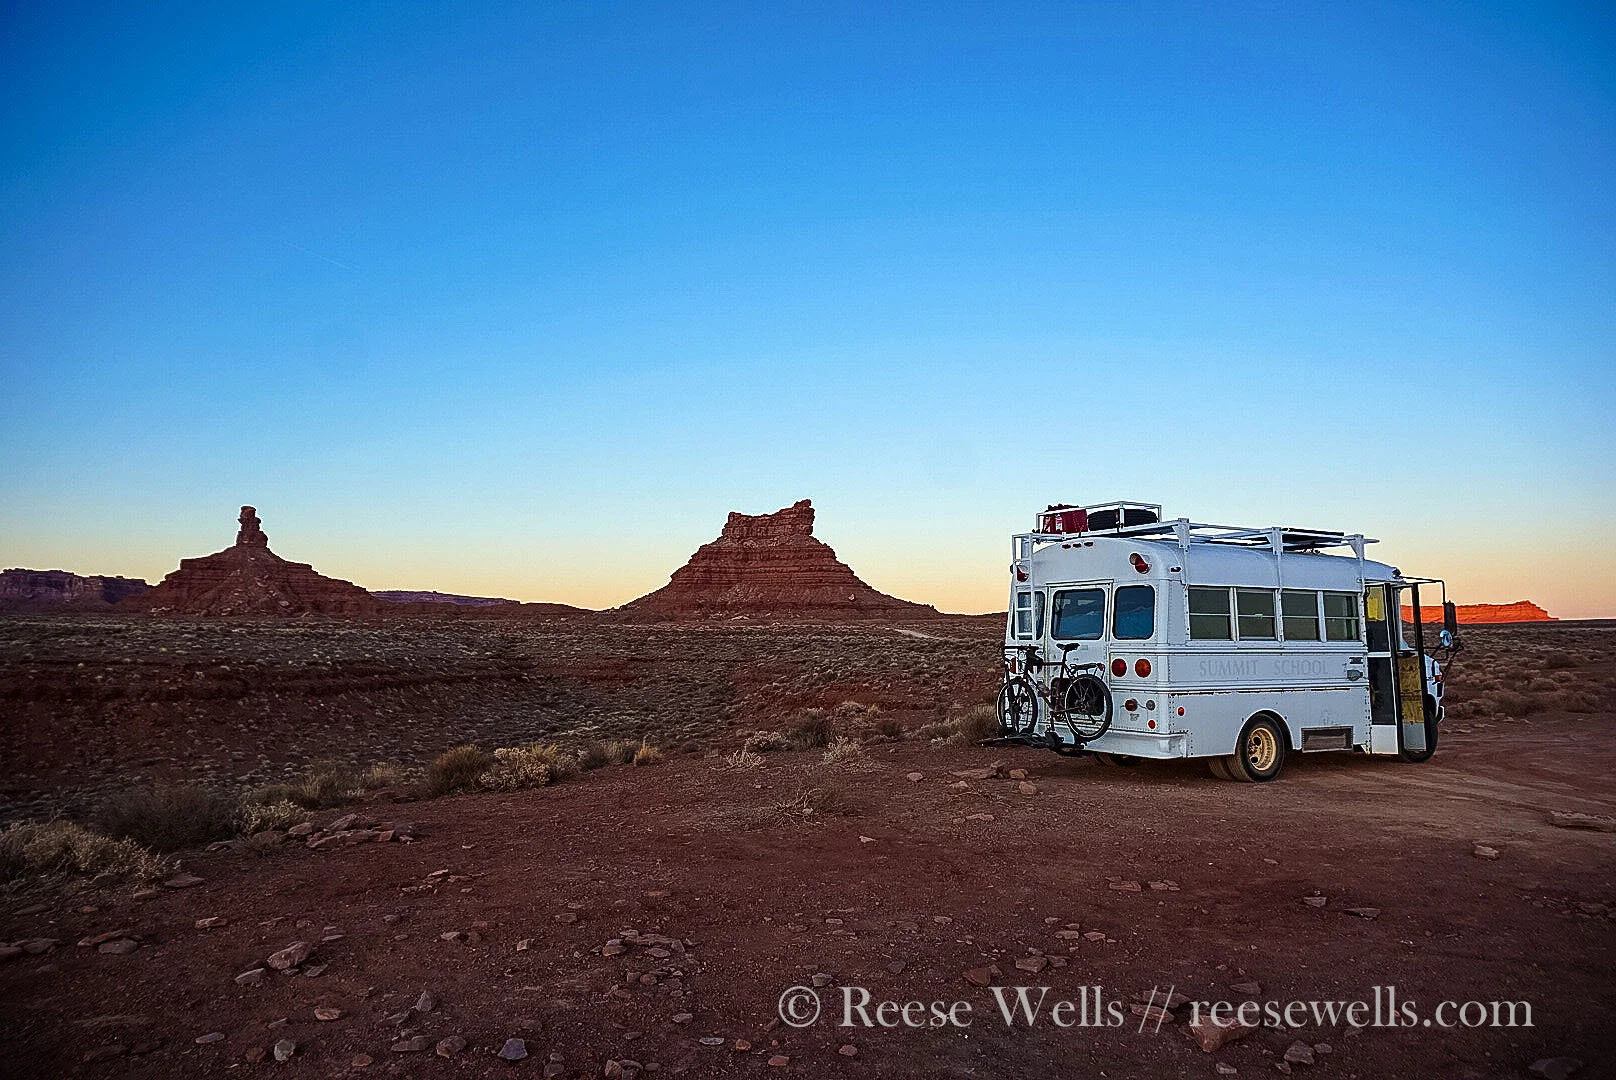
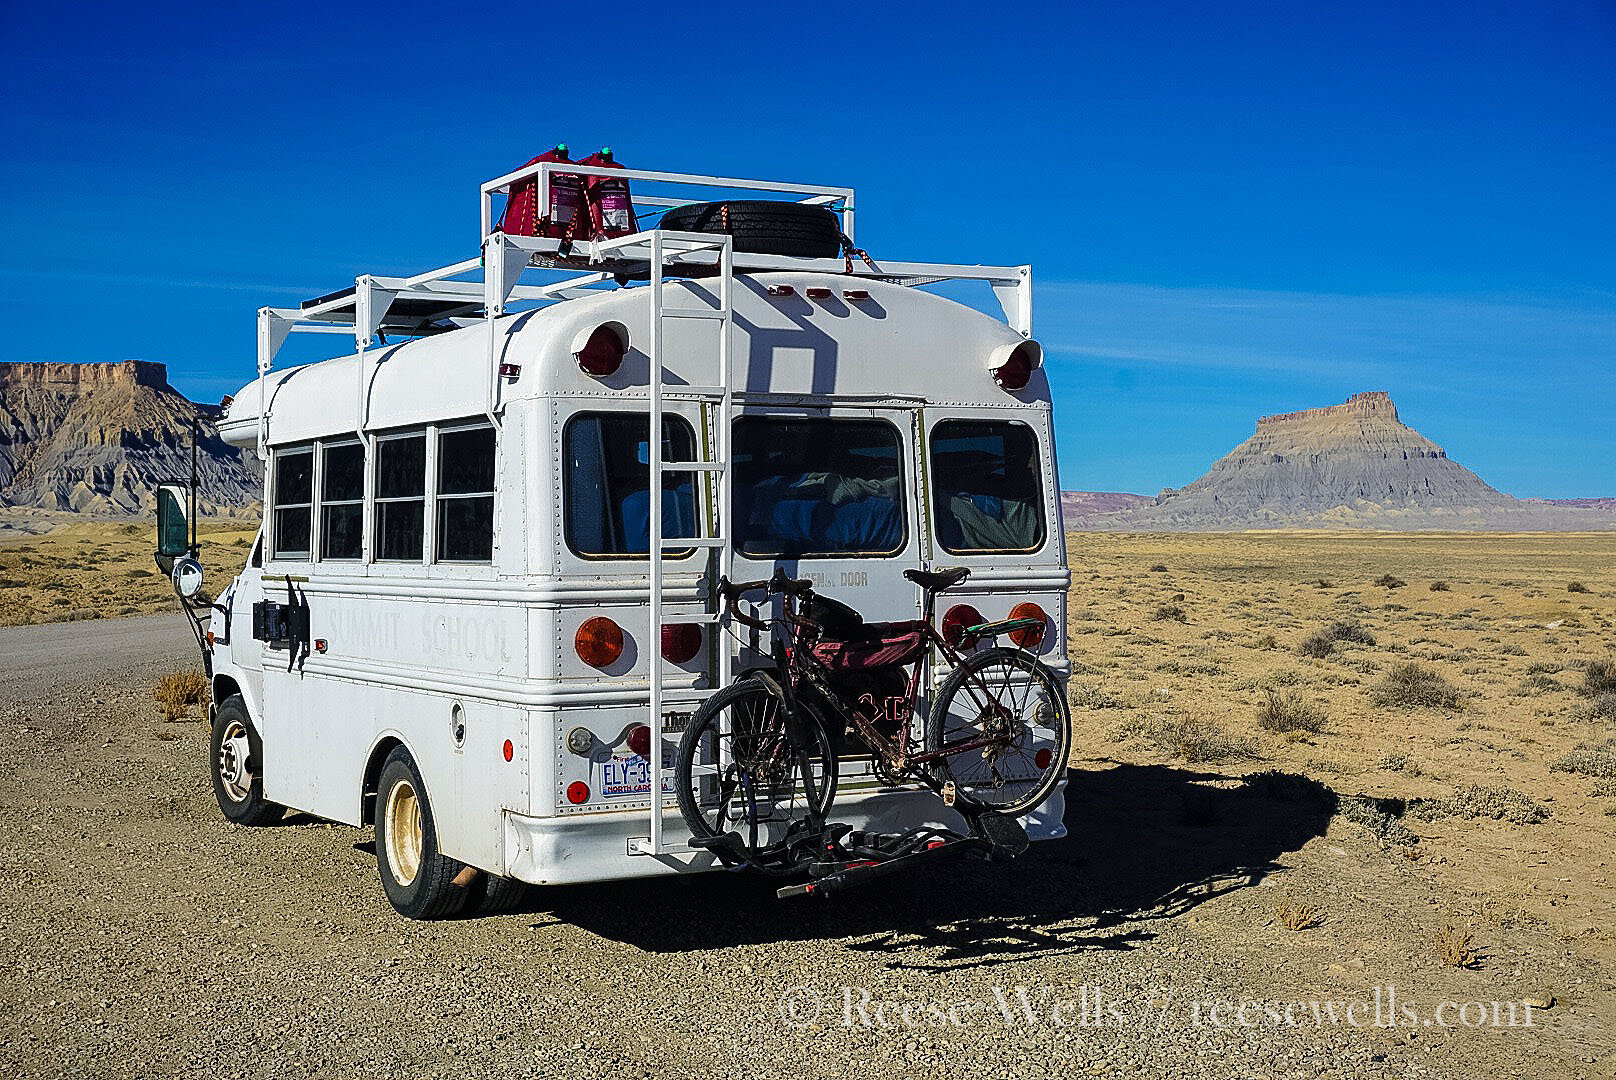
Roof rack, ladder, & hitch installation at work in the desert.
I’m still amazed by the amount of work Dad and I got done in two weeks. It was during these twelve hour days of bus work that I came to the conclusion that buses aren’t meant to be lived in. They are holy terrors of conversion projects. It seemed like everything, EVERYTHING, needed to be custom fit. The roof rack and ladder were obvious, but the hitch we installed took hours to cut, fit, cut again, tack weld, full weld, and clean up. One of the steps leading up from the swinging doors was caving in, and that needed to be fixed. We built new wheel wells for the back wheels, rounding out the metal on huge rollers. Made a box for the gas can sticking into the interior. Cut and bent and installed a new mount for the swinging door arms, one that was small and generally unobtrusive at the bus’s front. Every day there was some huge undertaking, one that carried more weight because of the deadline of my impending departure.
And yet, somehow, we finished it. I’ll never forget painting the roof rack with twenty cans of spray paint, then installing the solar panels, and watching Dad lift the rack up with a fork truck. He positioned it over the bus and I helped align up the rack with the vertical struts we’d installed. I bolted in the rack and stepped back. Adventure rack = adventure bus. Do the math. It checks out.
It was during this stage of the project where I realized just how truly fortunate I am to have a father so invested in Crunk, who wanted the absolute best for me and my future life in the bus. I didn’t know then how much I’d miss him, or his help, when I moved out to Durango.
West I went, bus clattering all the way to my new home.
Stage VI, Walls & Front Cab
Beadboard walls and creative storage solutions at the bus's front.
Out in Durango, my schedule had to change. Gone was the routine of all bus all day. Suddenly I had a job which demanded eight straight days in the wilderness. No Crunk work to be done there. But, I have been fortunate in having six days off between shifts, and it is this schedule which allowed for a serious three months of interior work.
Arriving in Colorado in the meat of fall was a bit of a shock. The weather was still getting into the thirties at night, with promises of the bitter cold come winter. I hoped to have Crunk livable by Christmas, which I'd been told was when snow truly began falling in earnest.
So I got to it. First were the walls. I chose tongue & groove beadboard, after one of my closest friends, who is also working on a van conversion project of her own, shook me like a rag doll in a passionate argument about beadboard vs other wall materials. My apathy about beadboard was soon replaced by a healthy appreciation for the aesthetic, and while I can now only see slivers of beadboard around the finished build, I find comfort in knowing that those sexy tongue & groove lengths of hard straight wood are sticking tight and naughty against the metal shell of the bus.
With the walls finished I turned my attention to the front of the bus, which was a righteous shitshow. Bare metal floors covered in dirt. Door gaskets falling off the frame. An occasional leak in the front windshield. The road trip out to Colorado had really done a number on my lady, and she needed some good quality time with my ten-fingered cosmetic team. I laid down insulation and carpet on the floor, resealed the door frames, found and fixed the leak, and built a little shelf shrine above my driver's seat. It's pretty to look at, and though the picture I placed up on the shelf falls off and hits me in the head at every exceptionally hard bump, I feel like the bus's front is now something to be proud of, rather than tolerated.
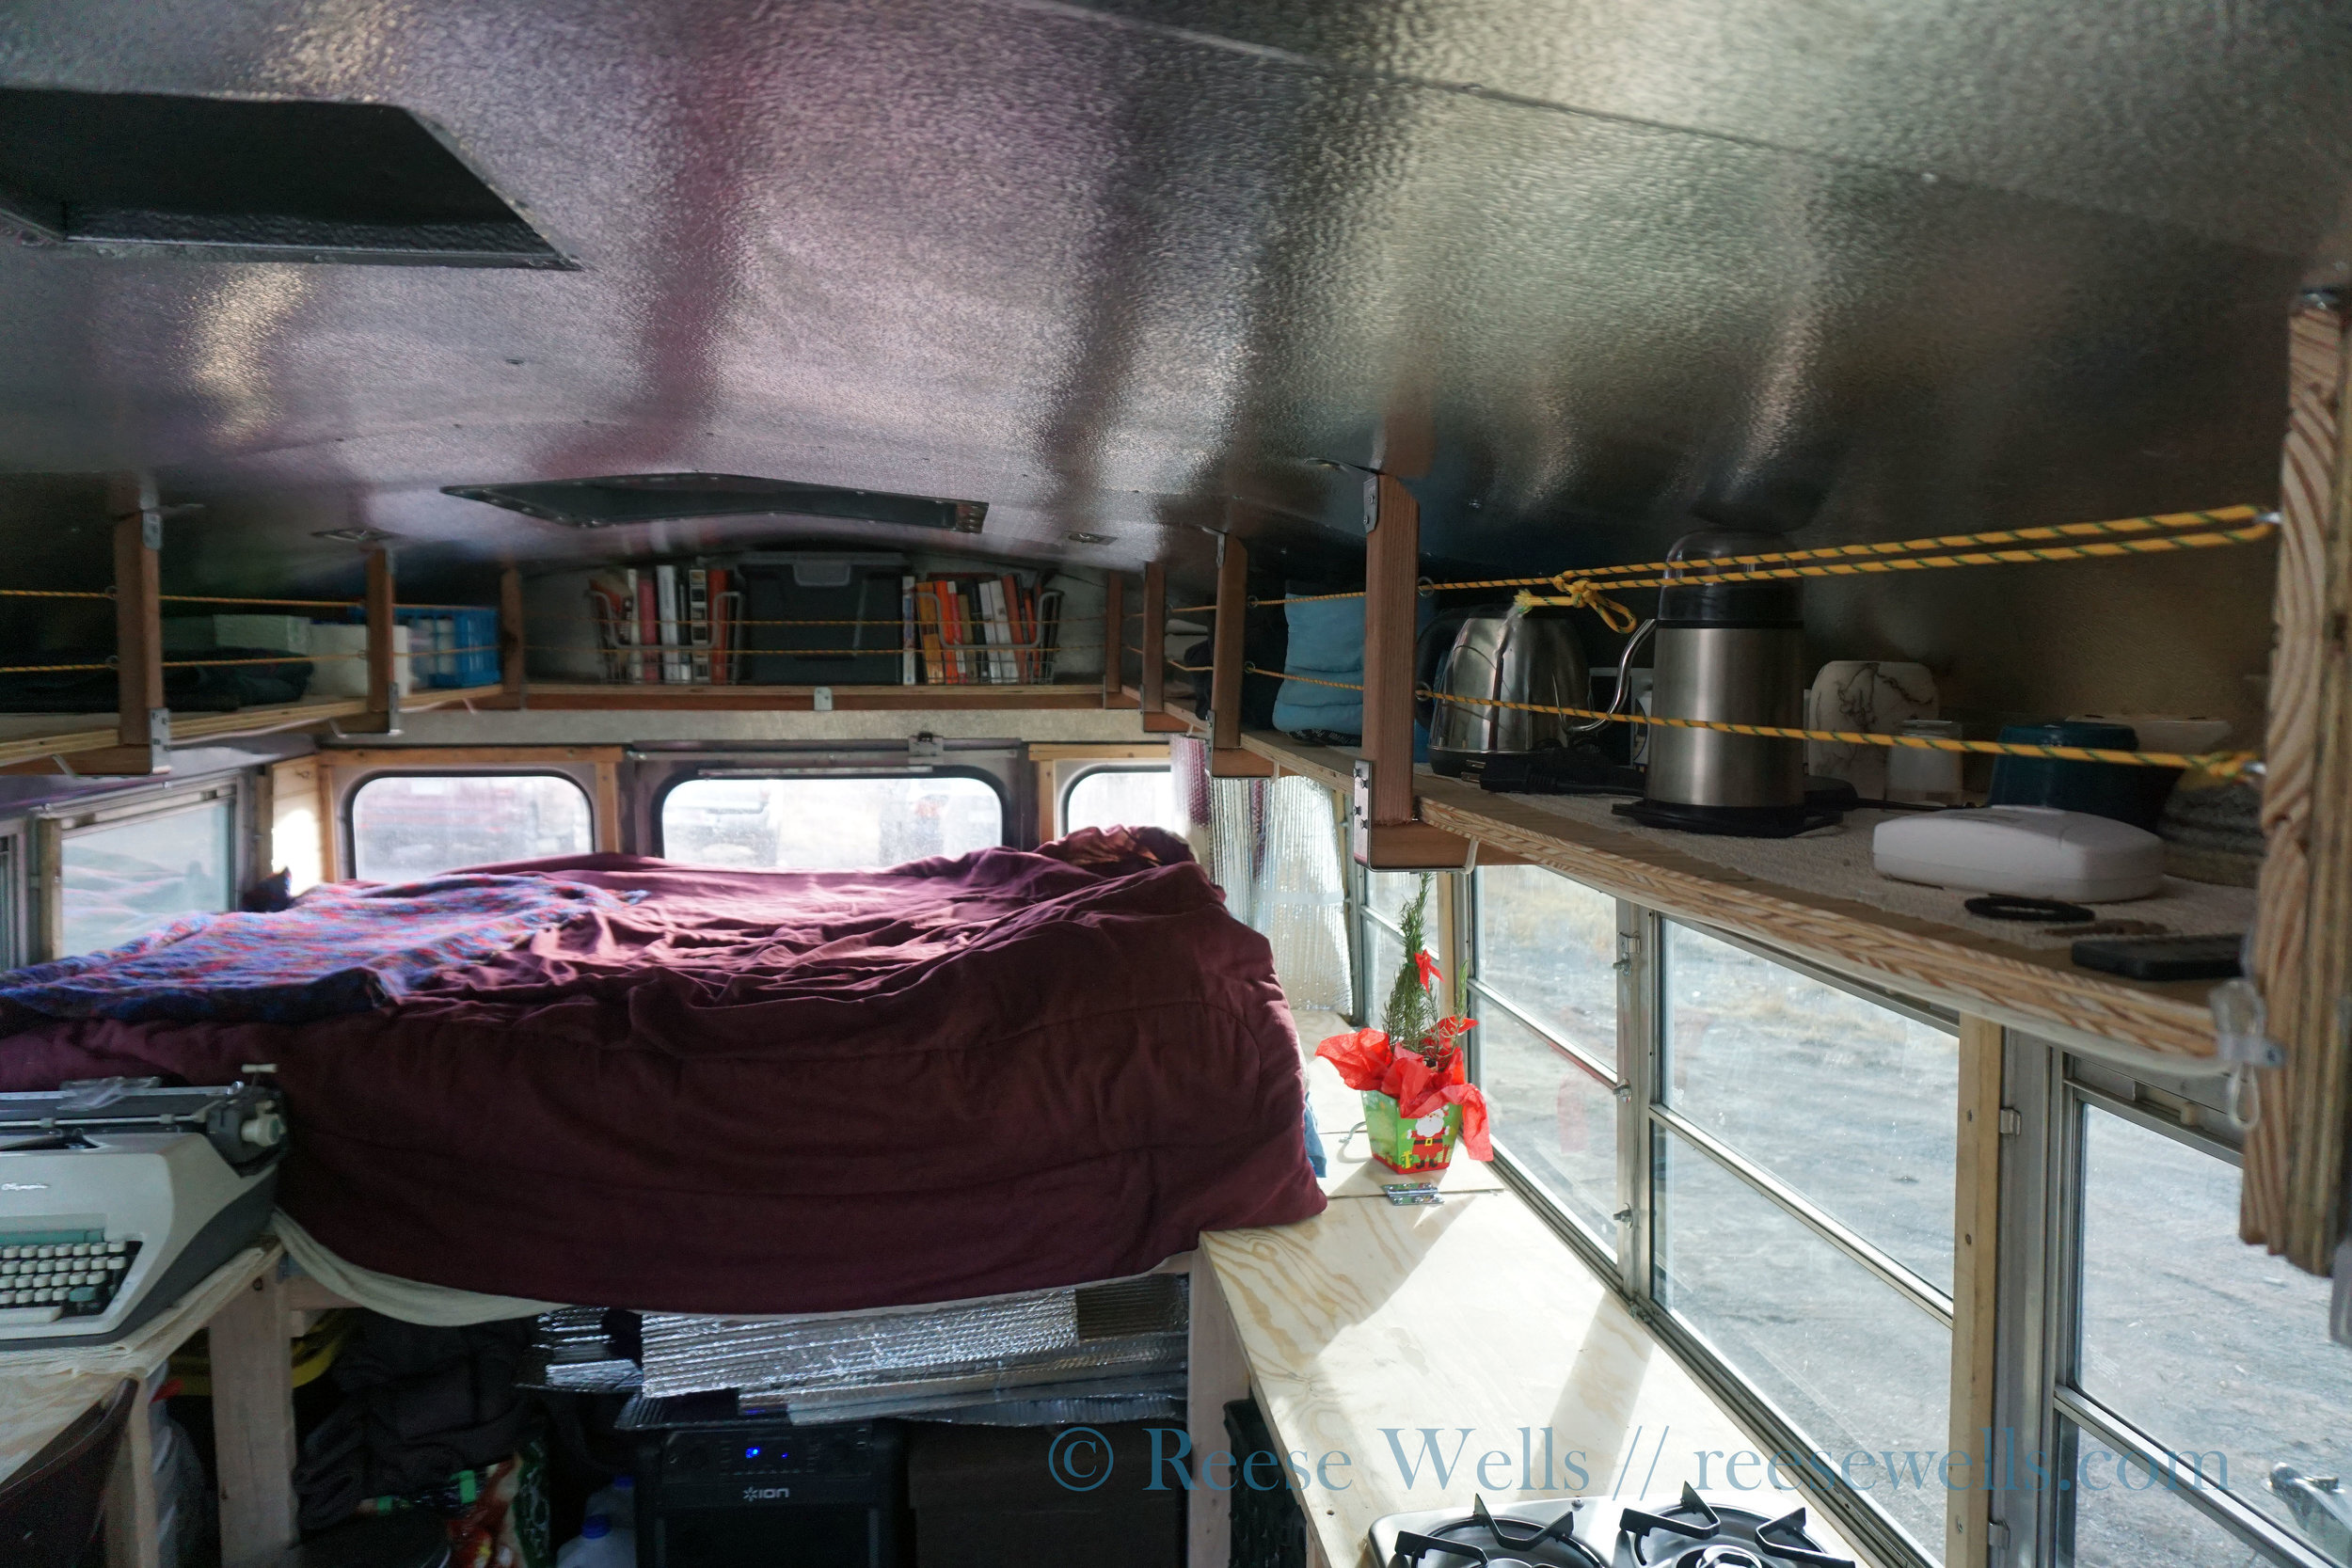
Stage VII, Bed Frame

Building out the bed frame with plenty of storage underneath.
The bed frame marked the first stage of the construction phase that required me to span wood into and about the bus's interior. This required a whole slew of exact measurements, and with it a specific sort of patience which has historically been absent from my normal disposition. Hooray for personal growth.
My goal with the bed frame was pretty simple. I wanted an exact fit for a full size bed, with a, and I quote, "dickton" of storage space beneath. A dickton equated to roughly 25" of clearance so I could slide my Husky construction containers underneath, one dedicated to hardware, the other to outdoor gear. Ah, hobbies and priorities.
Really, this was a simple project. Since I'd done a good job on the walls and at this point knew each intimate inch of my tape measurer, skill saw, and corded drill was able to measure, cut, and drill in both the supports and plywood platform in six hours. The final piece of this stage was adding two horizontal panels on hinges to the headrest of the bed, one for extra blanket storage and the other for easy access to turn on and off the 20 lb propane tank which would soon be powering my stove.
That night, I was sleeping in style.
Stage VIII, Shelving
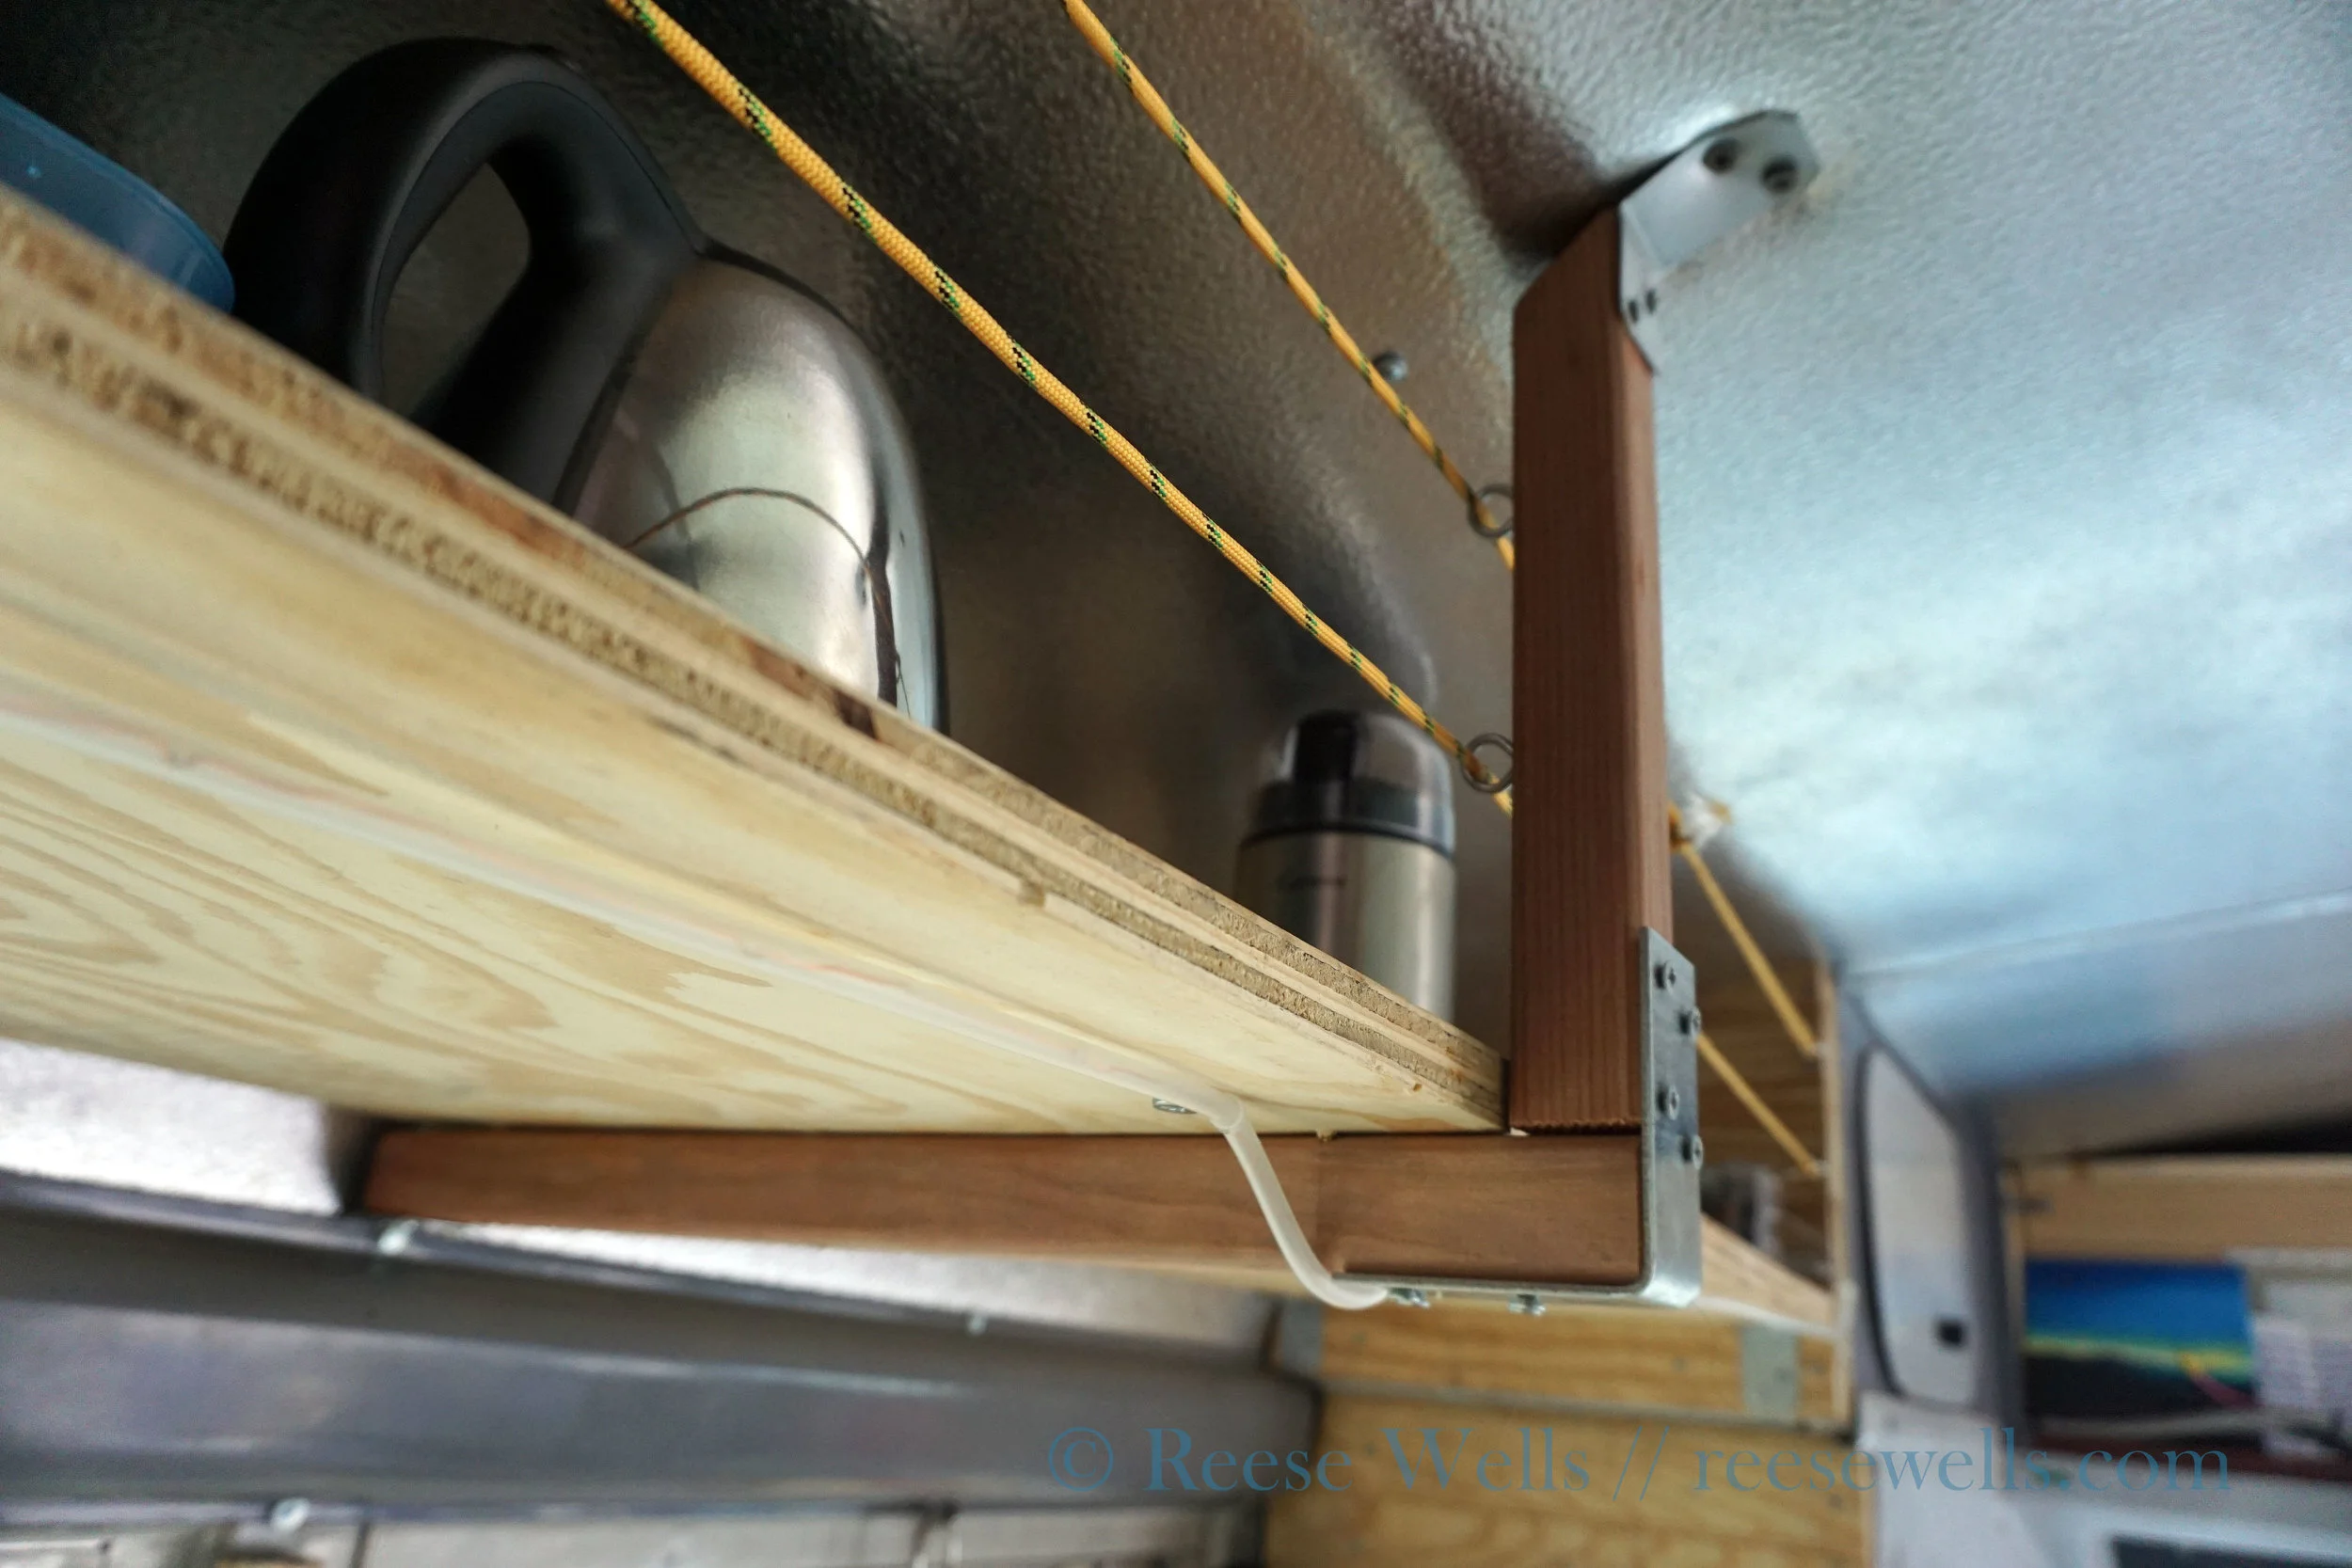
How I built the shelving system. Pretty slick, mildly aesthetic.
The shelving was the next logical part of the project, mostly because I was sick of all my shit sliding around my feet as I drove, stereo flying out and smashing a passenger window on sharp turns. I'm very sensitive to my space, and what my space had been communicating for some time was that I was an unorganized slob. So I decided to class up the bus and cut up a wall-to-wall-to-wall shelving unit, where I could deceive my naked eye by placing all my crap up high, rather than down low, and thus convey a sense of peace and relative prosperity.
It was pretty fun, making a set of 90 degree braces bolted together with metal brackets, and then screwing those sturdy fuckers straight into the thick framing struts of the bus chassis. The real pleasure came - and I'm talking a near-orgasmic sensation - with custom fitting plywood into framing and seeing an exact match. Talk about incentive for double checking a measurement. Sploosh.
I screwed in thirty eyehooks to the shelving supports and strung up a fifty foot length of p-cord, complete with a good old fashioned trucker's hitch to tighten the puppy up. Shelving complete, I felt like a king of a small and tidy kingdom.
Stage IX, Desk & Toilet

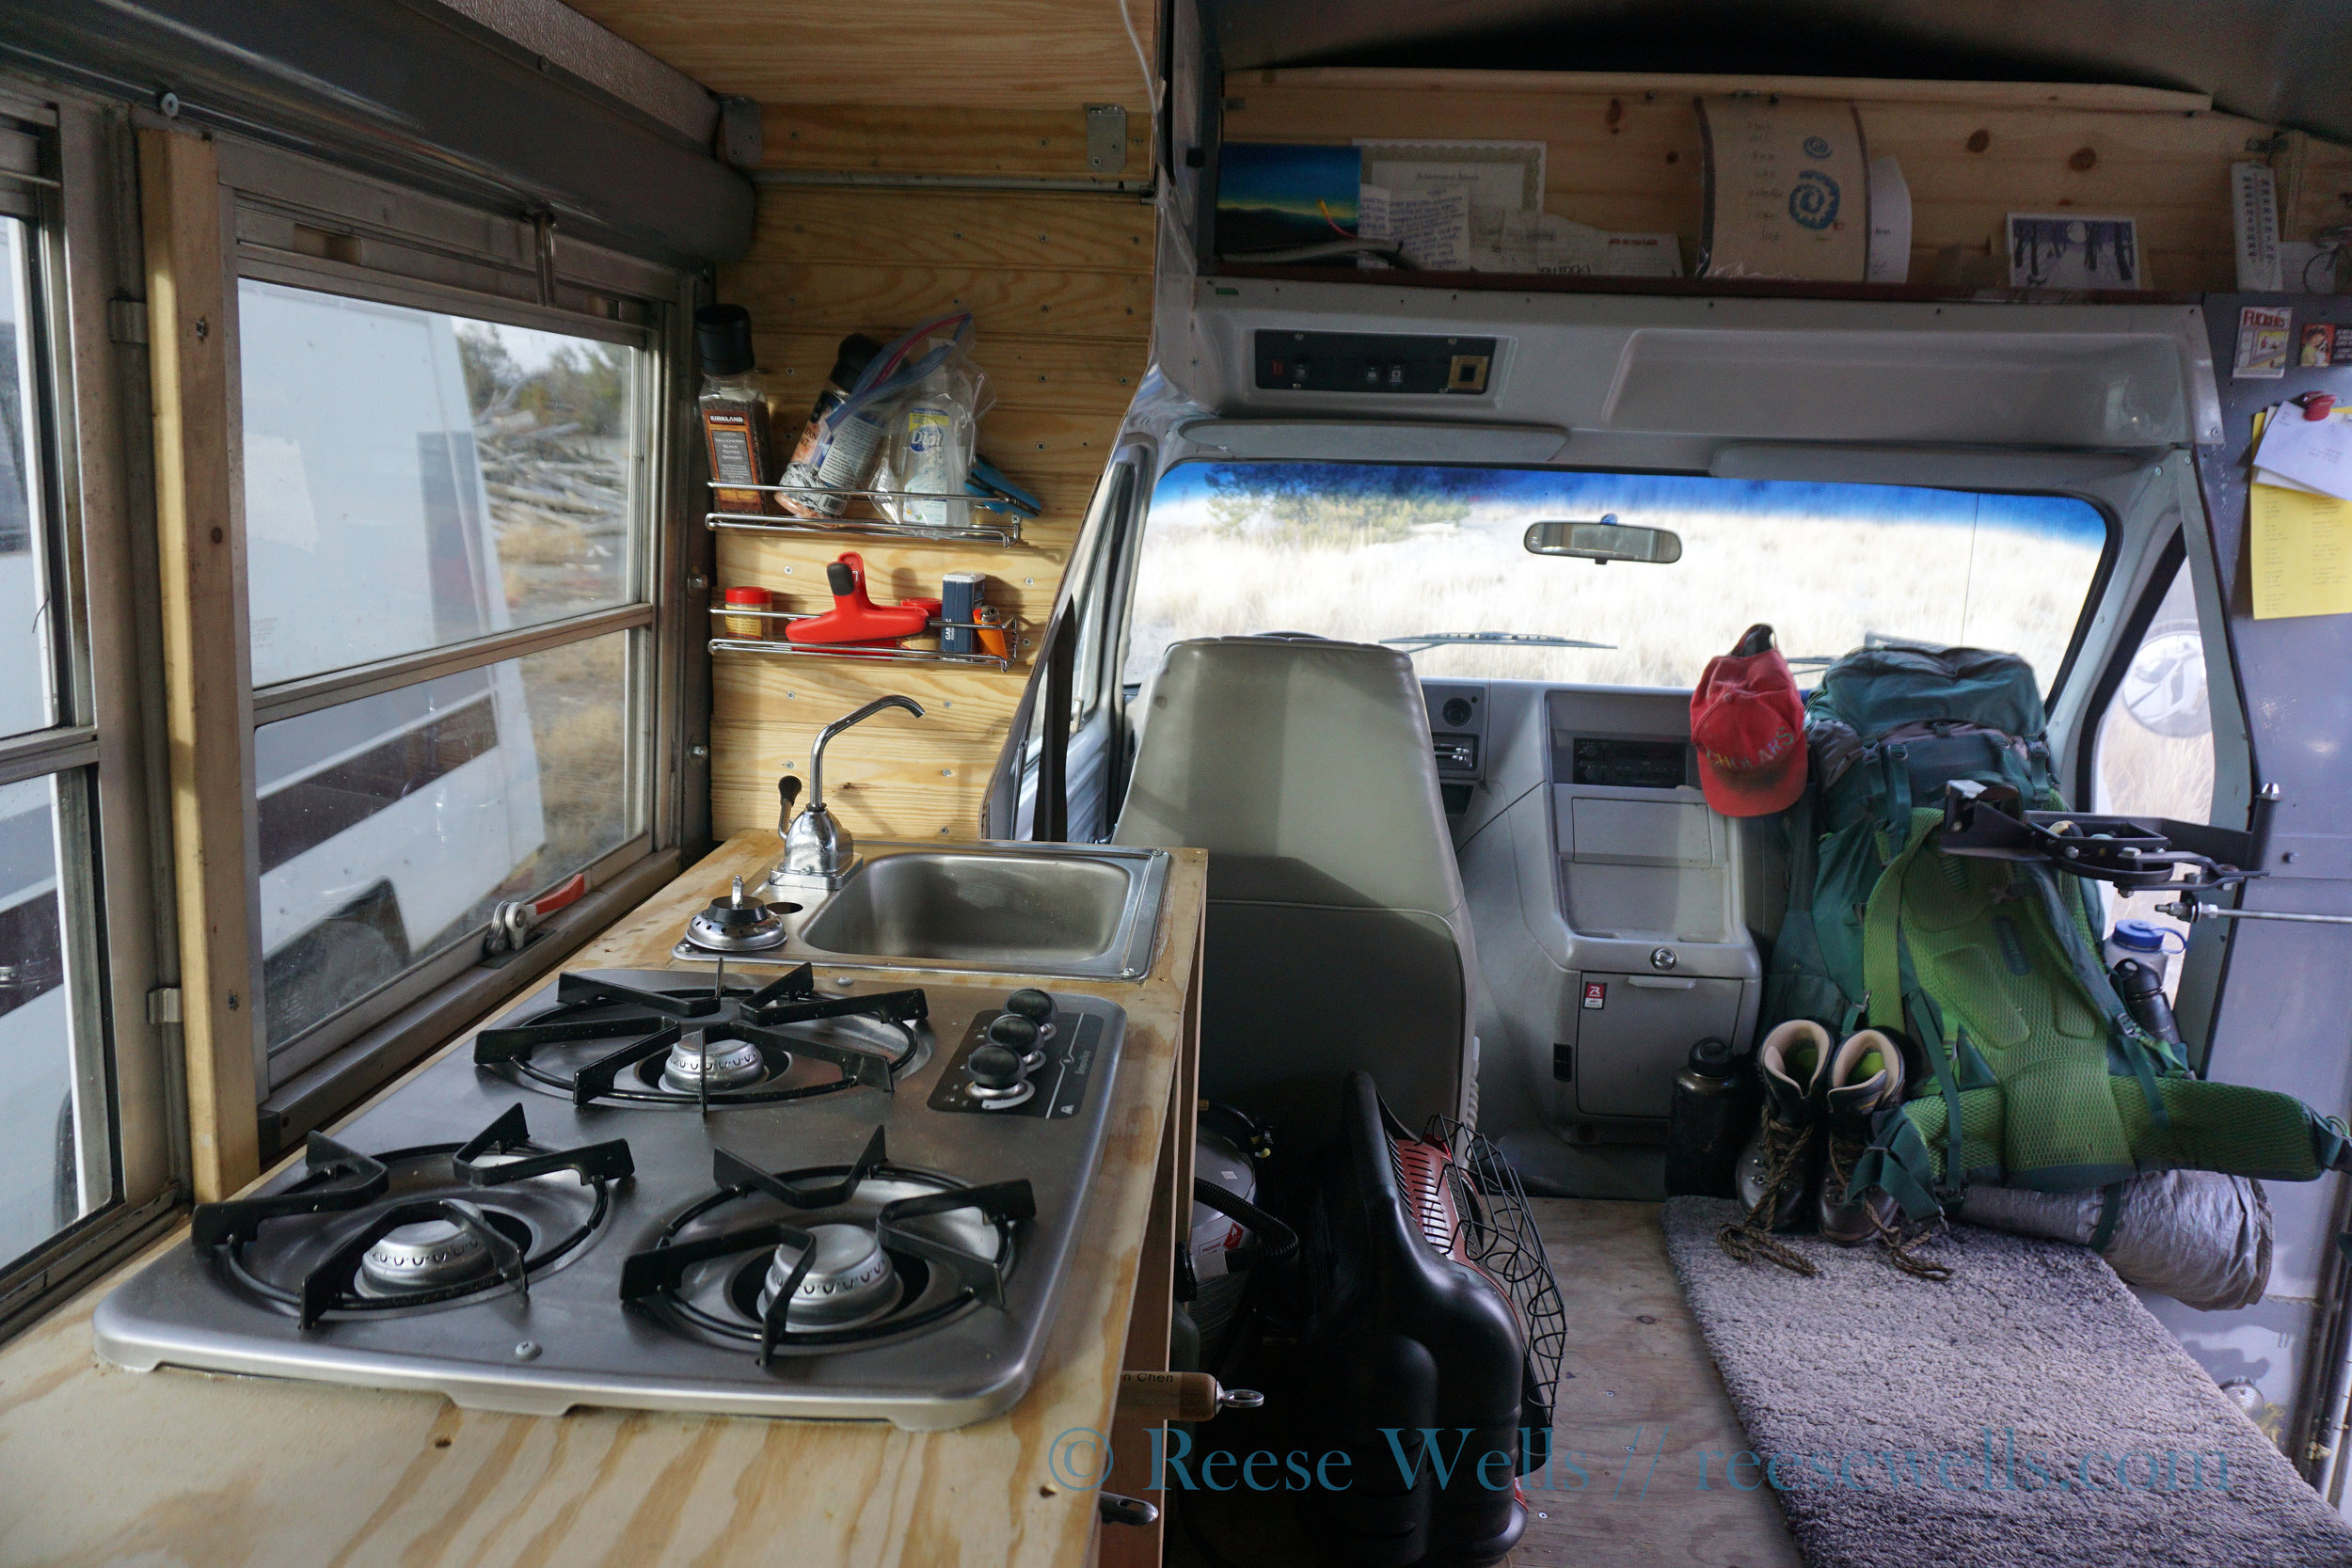
Tidy desk & toilet area. Great for working and pooping.
This was a big one. Being a writer of self-aggrandized importance, and with a fancy for living out of Crunk through graduate school, whenever that future goal may be realized, I wanted a real banger of a work station that was comfortable, neat, and large enough to bear the load of my ancient Olympia typewriter. And, space allowing, I wanted to install a tasteful five gallon bucket into which I could evacuate my bowels whenever I damn well pleased.
This was an especially rewarding stage of the conversion, because I was able to visualize, sketch, and custom fit pieces. Rather than build out shelving units with sliding drawers I took the easy way out and built the desk around a plastic shelf piece that I've had since childhood. It's not a conversation starter but it holds my socks, and that's enough for me. I took my battery unit and fit it in with styrofoam insulation so that my battery doesn't die in the coming cold winter months, and built a shelf above that for a milk crate full of office supplies. I left enough room for my grandmother's chair to slide between the plastic shelf and the milk crate, and dropped a 3/4" sheet of plywood over top. I am ready to write, eat, change, and charge my electronic devices. Hot diggity.
Highly sophisticated bucket toilet layout.
Moving to the left, I went about the rather difficult process of cutting a correctly sized circle into a piece of plywood so that I could sit on my Homer bucket and shit with suave maturity. In my mind, not seeing the bottom of the bucket was an integral piece to this puzzle. With that complete, I searched long and hard for a sturdy toilet lid that could snap onto the lip of my bucket. Success came, and I am grateful that it's both plush and fashionable. I like to poop in style, you know, so it wanted it to be nice. Future thinking, whenever I'm lucky enough to find myself in a relationship with someone who doesn't mind defecating with me drinking tea right next to her, I want her to feel really comfortable. I hope she can think, Hey, it's more than just pooping into a plastic bag in a five gallon bucket in a short bus in the middle of nowhere, it's life with a partner who cares about me and appreciates me for who I am exactly.
So I took a lot of time with the bucket toilet. And it was a pain in my ass. Hopefully, when referring to my nifty new in-bus toilet, the pains in the ass stop there.
And just like that, the desk and toilet were complete! I've since had a whole heap of fun working at my desk and, in the mornings, laying waste to the bucket toilet with great glee, then putting these WAG bags into my friend's trash cans when I stop by to visit. Wahoo for friends!
Stage X, Kitchen

Yay! I can cook and clean now!
This is the last major stage of the Crunk Conversion Project, CCP for those acronym-minded folk with an affinity for fewer syllables. The kitchen, oh the kitchen, was a real pain.
Expectations are a real problem in my life, and for some reason I expected this stage of the project to be easier than others. I had, at this point, basically built a home out of a short bus. However, it was during this stage that I both bled and cursed more - these events not being mutually exclusive - than any previous stage. A lot of if came with attempting to install the sink system.
A brief note about sinks - I am not a plumber. This was evidenced by my difficulty installing a single block sink. Maybe it's because I bought the cheapest sink on the market, maybe it's because I bought the wrong drain plug, but damn if I hit every road block in the books. The sink didn't fit in its original orientation. It wouldn't tighten to my plywood top. I couldn't properly fit the hand pump into its pipe hole. The drain plug was the wrong size and needed to be widened. Eventually, after the whole fucking sink was covered in my blood and unabashed vitriol, I took an angle grinder to it and cut me some holes in that cheap metal material. I dropped the bastard in, drove in some self-tapping screws, secured it down with liquid nails, waterproofed the whole system, and moved on to the stove. Ya-fucking-hah.
Look at all that pantry space!
The stove is a tasteful three-burner which was blessedly easy to install and hook up to propane. Gratitude for you, my wonderful Wedgewood stove. I am excited for all the lovely meals which we shall make.
In looking at the kitchen area, something that I am most excited about it all the pantry space. I have room for three milk crates, my 'refrigerator' is a Canyon cooler with a rated ability to hold ice for three days during the summer, and plenty of storage underneath for my bus chocks, a fire extinguisher, and cleaning supplies.
To round out the affair I popped in a couple of spice racks to the right of the sink and called it a job well, if painfully, done.
Stage XI, Finishing Touches

The view when you walk up the steps and into ... the Crunk.
With the major projects wrapped up and a fully functional, mostly comfortable Crunk ready for the road there were just a couple of details I needed to address.
The first and most important was adding insulation to the windows. I decided to rock out with Reflectix, which is like bubble wrap for adults. I decided to run a ten foot bundle down each side of the bus and keep each wrapped up with velcro when driving around. It's a bit goofy but does a good job at keeping hot air in and cold air out. It also has an added bonus of bouncing light around the bus, which makes a little incandescent lighting go a long way.
Next, I strung up a battery powered LED strip along the underside of my shelving system. Being generally sick of worrying about hooking up power to my battery system, I can just walk into the bus, pop the light on, and go about my business without plugging and unplugging cables or worrying about available power. The light is not bright enough to read by, but once I install some battery powered lamps above my desk and bed I'll be able to read Vonnegut late into the night.
Finally, I have been thinking about some feng shui to make the bus feel more like my own. I want a robust shrine, a blessed wall, photos of my family and dog. There is love in the little details, and I am excited to add photos as the bus becomes a comfortable and well lived space.
Reflections & Closure

A well lived, well loved space.
It's been a wild five months since Crunk came into my life. I could spend several paragraphs talking about all the struggles and hardships I've had to overcome to get where I am - living out of a 14 passenger bus in the middle of the San Juan mountains - and then close with a sappy few sentences about the unique and rewarding nature of living out of a mobile home. I'm not going to do that.
Rather, I'd like to offer a deep statement of gratitude and respect for my Dad, who helped me so much. This project, unlike anything we've ever done before, brought us together in a way that I will value until the day I lose my memory in advanced age and senility. It was an opportunity to connect and experience unconditional love through turning a vision into a reality. Love you Dad.
Also, I'd like to thank Elise, Sam, Katie, Nick, Will, and Mom for their help with Crunk. I look forward to paying this forward with future conversion projects of friends (and, fingers crossed, family).
Finally, I'm going to close with this - what we dream is possible to make into reality. We are the makers of our own decisions. My journey with Crunk started with a serendipitous conversation at an elementary school cafeteria table. For the dreamers and seekers who have read this far, what you want is there - go out and get it. You'll have my full support.